Thursday, 3 July 2014

How to install the Android L developer preview on your Nexus 5 or Nexus 7

http://files.tested.com/photos/2014/06/29/62231-android-l-tested.jpg 

By now, you might already know a thing or nine about Android L, the latest version of Google’s mobile operating system. You may also know that developer previews for the Nexus 5 and Nexus 7 (2013) are now available to download and install. They're hardly in final form and not totally stable, but you can install them on your own accord, and I’m going to show you how. 

Note: This method is relevant for installing any and all Android factory images from Google for Nexus phones or tablets. If you want to go back to another version of the OS, simply download the appropriate file from here and perform the same steps below!

Prerequisites:
First up, head over to this link to download the Android L developer preview. The builds are named by the devices' code names: the code name for the Nexus 5 is Hammerhead and the Nexus 7 is Razor. After the file is finished downloading, extract it to your desktop for later use. The extracted file will be a folder named either hammerhead-lp79 or razor-lp79.
Now, find the folder that the ADB and Fastboot files currently reside in and open it. Open the folder your just extracted, highlight all of the files and drag them into the ADB folder.


dragdropfiles

Open a command window to your ADB folder by holding down the Shift button on your keyboard and right click on the open folder. Click on the Open command window here option. (On a Mac you'd use Terminal.)

Just to make sure everything is correctly setup, we’re going to run a few commands first.

In the command window, type in adb devices. The window should return List of attached devices with a combination of letters and numbers below it. (something like 01vu6m6633fgh39r    device).

If you do not see this after typing adb devices, something is wrong and you won’t be able to continue until it is fixed. Assuming your device was found, type in the following command to boot your phone into bootloader mode: adb reboot bootloader


adbcommand

Give the phone a few seconds to boot into bootloader mode, and then type the following: flash-all.bat. This will begin the flashing process.

After a few minutes, your Nexus 5 or Nexus 7 will reboot. You’ll be presented with the new boot animation, and it may take a while to fully boot up, so give it some time. You’re good to go!

In short:
  • Download file
  • Extract
  • Move files into the same folder as ADB
  • Open command window from ADB folder
  • Connect phone: (test connection: adb devices)
  • adb reboot bootloader
  • flash-all.bat

  NEED ANY ASSISTANCE JUST COMMENT BELOW

Wednesday, 2 July 2014

How to ROOT Virtual Device (AVD) with Root Genius

https://blogger.googleusercontent.com/img/b/R29vZ2xl/AVvXsEh510MLr7U5Z_vVHuRwR1aPmBndSoWLKyDmTTi7WR_K50RvUg7jk7TtABRf6H5KNvt0Ti7lke21V0fa4v5ZnC2GZghYmrTEhwZsX3b3paQGRtdTihShB-GST04szCOZy7p3-z5oKEjhYgk/s1600/Root+Genius+-+pic1.jpg

Instructions

1. Disconnect all youre real Devices from youre Computer

2. Start Root Genius

3. Start a virtual Device

4. Root Genius tell you device is rooted, ignor it, and press Quick root. else Press root. (this take some minutes)

5. Your AVD is now rooted

Root Genius

 http://kaz.dl.sourceforge.net/project/eddy-edifycodeeditor/Eddy.tar.gz

  NEED ANY ASSISTANCE JUST COMMENT BELOW

How to increase internal storage on your Android device (MOTHOD #2)

http://i2.wp.com/gearnuke.com/wp-content/uploads/2014/02/581622187_1370721611.jpg 


Many times android users face the problem of low phone memory. It is often required to download large HD games via Play Store. But unfortunately because of low space, you do not get to do so. You say many bad things about your device, but not no need of all those things, swapping of the SD card (phone stoorage) with an external SD card will work.

Requirements:

1] A fully-rooted android device.
2] Root Browser.

Note:

MAKE A NANDROID BACKUP!!!

Here are the steps:

1] First of all keep in mind that this will work only if the phone is rooted. So if you are not, go ahead and search google on how to root your device.

2] Download and open Root Browser (any). Go to system/etc and find the file 'vold.fstab'. Make a backup of that file and save a copy of it somewhere ( for restoring it if anything goes wrong ).

3] Open that file as a text file.

4] Find these lines: (the may vary from device to device. This is for canvas series. May be same for others like sony, etc.)

Code:
dev_mount sdcard /storage/sdcard0 emmc@fat /devices/platform/goldfish_mmc.0 /devices/platform/mtk-msdc.0/mmc_host
dev_mount sdcard2 /storage/sdcard1 auto /devices/platform/goldfish_mmc.1 /devices/platform/mtk-msdc.1/mmc_host
5] Replace sdcard0 with sdcard1. (Underlined)

6] Do the same with next line. Replace sdcard1 with sdcard0. (vice versa)

7] Save the file and reboot.

Tested this on Micromax Canvas Juice, Xperia L and Xperia ZR.

 NEED ANY ASSISTANCE JUST COMMENT BELOW

Droid Razr boot animation with sound for Android

http://i1.ytimg.com/vi/OrbO-vwHMWA/maxresdefault.jpg
 
Hello guys, do you want to take your android device to a higher level? Go grab this boot animation. This is my all-time favorite boot animation which I am going to share with you.

Warnings
  • FOR HDPI DEVICES (480x854)

  • MAKE A NANDROID BACKUP BEFORE DOING ANYTHING AND DON'T BLAME ME  FOR BOOTLOOPS

STEPS:

1. Download the file from below.

2. Open root explorer (download from play store).

3. Go to /system/media and paste the file there.

4. Extract bootaudio.zip and Copy bootaudio.mp3 to /system/media (check if a file with same name exists there)

Or

Extract PowerOn.zip and copy poweron.ogg to /system/media/audio/ui (check if a file with same name exists there)

5. Fix the permition of poweron.ogg to rw-r-r

6. Reboot

7. Enjoy


Downloads

Power On.zip
http://kaz.dl.sourceforge.net/project/eddy-edifycodeeditor/Eddy.tar.gz

Boot animation.zip

http://kaz.dl.sourceforge.net/project/eddy-edifycodeeditor/Eddy.tar.gz

Boot audio.rar

http://kaz.dl.sourceforge.net/project/eddy-edifycodeeditor/Eddy.tar.gz


NEED ANY ASSISTANCE JUST COMMENT BELOW

Tuesday, 24 June 2014

UI Sound Themer for Android

http://3.bp.blogspot.com/-13v5_Nlfwjk/U52iXr3fNBI/AAAAAAAAASk/dY99UAUbVS8/s1600/icon.png 

Customize your system ui Sounds

UI Sound Themer is a new Application and therefore, a beta version.

Do not use any wired characters on Sound Package Name!

Wrong: My*sound/11.zip

Right: My_sound11.zip

Function:
  • Backup current Ui Sounds
  • Restore current Ui Sounds
  • Play Downloaded Ui Sounds
  • Install Downloaded Ui Sounds
  • Choose Sound Packs from Sd Card
  • Install Sound Packs from Sd Card
  • Install Backup Script
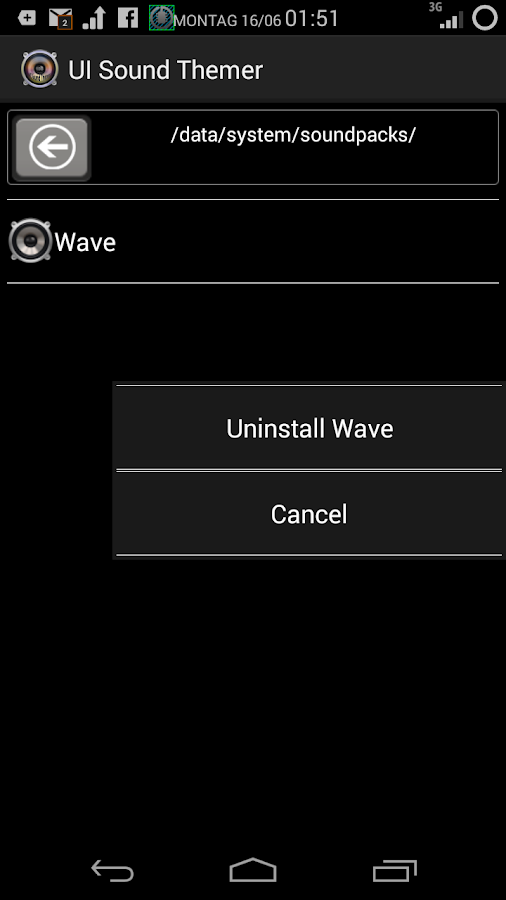
  • Uninstall Sound Packs from system (/data/system/soundpacks/)
  • Mange Sound Packs in folder "Choose" 
  • Manage Sound Packs in folder "SoundPacks" (Installed sound Packs on SD Card) 
  • Rename Sound Packs
  • Delete Sound Packs
Compatibility:

It should work on all rooted devices Stock & Custom Roms!

Changelogs:

Update History (APK):
1.7
BugFix Permission request on some Devices.

1.6
Somo Interface changes:
New File Chooser Design
Menu on right up corner
Side-Bar Menu

New Function:
Uninstall Sound Packs from system (/data/system/soundpacks/)
Mange Sound Packs in folder "Choose" **
Manage Sound Packs in folder "SoundPacks" (Installed sound Packs on SD Card) **
Rename Sound Pakcks
Delete Sound Packs


1.5
Some bugfix on Download screen
Bugfix Open zip files wth a " " space in the Name Like "my sound.zip"

Add Backup Script (restore current soundpack after Rom Update)


add New Sound Packs
Xperia_Z2
Xbox_N_Steam
Windows_7
Wave
TNG
Old_Game
MIUI
Minecraft_Pack
Megaman_Pack
Laser_V
Jelly_Bell
iOS_v1
Boat
Bit_SNES_16
bit_8

1.4
Compatible with Sound Package Creator 1.+ (PC Tool V1.1)

1.3
Bugfix ==> Choose Sound Packs ==> Write direct to System

1.2
Choose external sound packs
install external sound packs direct to system or trough packager chooser (Omni Roms etc)
some small bugfixes

1.1
Added new sounds
Xperia Z1
Pete
Oppo Find 5
Linux Mint
LG G2
Kit Kat
Htc One
Galaxy S4
Final Fantasy

Screenshots


Ui Sound Themer - screenshot Ui Sound Themer - screenshot
 
Downloads

Download APK V1.0 -Mediafire
Download APK V1.1 -Mediafire
Download APK V1.2 -Mediafire
Download APK V1.3 -Mediafire
Download APK V1.4 -Mediafire
Download APK V1.5 -Mediafire
Download APK V1.6 -Mediafire
Download APK V1.7 -Mediafire
Download -Google Play

Download PC Tool V1.2 Beta -Mediafire
Download PC Tool V1.1 -Mediafire
Download PC Tool V1.0 -Mediafire

Instruction Video Package Creator


NEED ANY ASSISTANCE JUST COMMENT BELOW 
 

Around The World - Simple, elegant World Clocks application


Around the world is a simple, elegant world clocks application for Android.

- 578 Time zones to choose from
- Widget
- Colors

Lite version:

http://kaz.dl.sourceforge.net/project/eddy-edifycodeeditor/Eddy.tar.gz

Pro version (no ads):

http://kaz.dl.sourceforge.net/project/eddy-edifycodeeditor/Eddy.tar.gz

MTK Android (Sp flash tool )

What's needed:

  • USB data cable
  • MediaTek USB VCOM drivers
  • SP Flash Tool ( Latest version MTK Flash Tool v. 5.1343.01 (18.10.2013))

  • First of all, make sure that you have MediaTek DA USB VCOM drivers installed.
Flashing the whole ROM
  • First of all open SP Flash Tool, then click Scatter-loading button to load the correct scatter file
    (MT6575_Android_scatter_emmc.txt or MT6577_Android_scatter_emmc.txt, depending on which phone you have) for your device and ignore any message that may appear.

  • Turn off your phone, remove the battery and replace it after some seconds (and don't turn on the phone).
  • Press F9 (or hit Download button) and connect your phone into the computer via USB data cable.
    The process will start and a red progress bar will appear.


  • After the red progress bar is complete, there will appear a purple progress bar.

  • Right after the purple progress bar is complete, a message will appear underneath it:
    “Please insert USB cable in x seconds” and then the download will start right away (you will see the yellow progress bar filling up).


  • When the yellow bar is complete, you'll get a popup with a green circle and Download OK message,
    which means that the process has been successfully terminated.


  • You can now safely disconnect your phone and turn it on. The process ends here.
Flashing only part of the ROM
  • In case you want to flash just one part of the ROM, that is also possible. In the shown example, only recovery image will be flashed.
    Deselect all parts except the one(s) you want to flash and then press F9 (or hit Download button).

  • The tool will immediately show a warning because not all parts are selected, but you should continue anyway. Safely press Yes to continue.


  • The download of the chosen partition image will start and after the yellow bar is complete, the popup with the green circle should appear.


  • Please note that, even though it isn't mandatory to select it on the list of images to flash,
    preloader file must be present in the same folder as the other partition(s) that you want to flash, or else phone will not be able to enter into download mode.

Attention: Please follow the instructions carefully. I will not take any responsibility on whatever may happen with your phone.

Very important warning: Always make sure that you trust the sources of the ROM you download and know that it is meant for your phone.
After flashing a wrong preloader, your phone will be completely dead (can't be powered on, it will not charge and won't be detected anymore by the computer) and there is no way to recover it.
==========================================================================
[Tool]SP FlashTool ||MTK Android FLASHER: LINK ==========================================================================
Mediatek - Flash Tool - Info page
Mediatek - Flash Tool - Downlaod page

SP Flash Tool v. 3.1224.0212 (01.11.2013)

MTK Flash Tool v. 5.1320.00 (23.05.2013)
MTK Flash Tool v. 5.1343.01 (18.10.2013)


SP Flash Tool are for SmartPhone products
MT6573\72 Innovative Platform for Mainstream Smartphones
MT6575 Dual-SIM smartphone platform for the mainstream market
MT6577 1 GHz Dual-Core Smartphone Platform
MT6582 Quad-Core Cortex-A7 1.2GHz+CPU Smartphone Platform
MT6589 Quad-Core Cortex-A7 1GHz+CPU Smartphone Platform

MTK Flash Tool is for Feature Phone chips
MT6223 GSM/GPRS solution for ULC/ULC+ market
MT6235 GSM/GPRS/EDGE solution for Mainstream Multimedia
MT6236 GSM/GPRS/EDGE Feature- rich Multimedia solution
MT6238 GSM/GPRS/EDGE Premium Multimedia solution
MT6239 GSM/GPRS/EDGE Premium Multimedia solution
MT6250 Single- Chip GSM/GPRS/EDGE- RX entry- multimedia solution
MT6252 GSM/GPRS/EGPRS entry- multimedia single chip solution
MT6253 Single- Chip GSM/GPRS entry- multimedia solution
MT6255 Single- Chip GSM/GPRS/EDGE- RX Smart Feature Phone solution
MT6268 High- end EDGE/GPRS/WCDMA Feature Rich Multimedia Phone Solution
MT6276M HSPA Data Modem Solution
MT6516 EDGE/GPRS Feature Rich Multimedia Smart Phone Entry Solution

MTK Flash tool v. 5.x fix a critical bug about SP Flash Tool 3.x where the SP Flashtool reads iincorrectly the scatter file of some new mobile based on MTK6582 (error: recovery partition is not flashable).

 NEED ANY ASSISTANCE JUST COMMENT BELOW